
Jade Style Coaching's™ Step By Step Guide On How To Declutter and Organise Your Wardrobe.
- Louise Jade

- Sep 2, 2022
- 9 min read
To Build the Closet Of Your Dreams Today

Credit: pexels.com
We have all been guilty at some point in our lives!
Guilty of hoarding items in our wardrobes. Neglecting items hanging at the back of our clothing rail that we likely haven’t seen for years. Owning many clothes and accessories, but only choosing to wear a few of them.
You may even look at your wardrobe and feel that it contains a mismatch of styles that you’re not even sure reflect you as a person, let alone compliment your body shape, colour characteristics (i.e. skin tone, hair and eye colour) and lifestyle needs. Sounds relatable?
This Post Will Delve into:

Credit: pexels.com
What is Wardrobe De-Cluttering?
Wardrobe de-cluttering helps to create order in our closets. It involves weeding out clothes and accessories that are no longer suitable for us and re-organising those that suit our style, body shape, colour characteristics and lifestyle. Wardrobe de-cluttering also helps us to see what items our wardrobes contain and take note of what clothes and accessories our closets actually need, as opposed to making impulsive and repetitive purchases, which not only take up valuable space, but waste money too.
Although this might sound like a daunting prospect, turning a messier wardrobe into a clean, tidy one can have many benefits, including:
Having a wardrobe that only contains items that suit you and your lifestyle.
Saving time and money by only buying items that your wardrobe actually requires.
Taking control of your “personal brand” and the image you want to convey to others.
Gaining a better understanding of your sense of style, which will help you to feel more confident and self-assured when dressing each morning and during social situations.
Being able to see which items you own, making coordinating multiple outfits with your existing clothes and accessories easier.
Gaining an understanding of past shopping habits and how these could be overcome when shopping in the future.
Feeling like the real “authentic” you is being discovered.
Now, before you start, take a step back and observe the following in your wardrobe:
Do you buy items in the same or similar colours?
Do you repetitively buy the same or similar styles?
Do you wear certain items more than others and if so why?
Is your wardrobe appropriate for your current lifestyle?
Are there any items that you have never worn?
Do all of your clothes fit well?
Tip: remember that our wardrobes should ideally be divided into the following:
60% of your items should be for day to day wear.
20% for wearing at weekends and during leisure activities.
20% suitable to wear for evening and special occasion events.
Focus On Your Ideal Wardrobe:
To gain the best results from this process, you need to remain focused on your closet de-clutter’s desired outcome.
Close your eyes and visualise for a second…
How would it feel to wake up every morning and walk over to a clean, organised and well-presented wardrobe space that works for you? A wardrobe full of clothes that help you to feel confident and you know suit your colour characteristics, style, body shape and lifestyle?
How would you like to start your day when getting dressed each the morning? Would you rather choose outfits from an organised, coordinated wardrobe space or a messy, cluttered space where you don’t know what you own or where anything is kept? I know which I would choose!
Now, let’s look at what wardrobe de-cluttering involves…

Credit: pexels.com
How To Declutter and Organise Your Wardrobe (With Tips):
First, be prepared with the following items:
A roll of strong bin bags
3-4 strong, reusable carrier bags
A laundry basket
A collection of wooden hangers (or strong plastic ones), including clip hangers suitable for hanging your skirts and trousers
Scented drawer liners
A selection of appropriate storage solutions (see later)
Small, clear bags (for storing delicate hosiery items)
An outfit for quick changes
A full length mirror
All your clothes and accessories gathered in one place
Wardrobe De-Clutter Steps:

Credit: pexels.com
Step One: Empty the Contents of Your Closet Space:
First, empty your wardrobe space of any clothes, shoes, bags and accessories. Remove any hangers and stack your clothes neatly on your bed. Also, place your accessories in a neat pile on your bedroom floor.
Tip: categorise items when stacking them on your bed, as this will make organising your wardrobe rail much easier later on. For example, place all of your dresses in one pile, your skirts in another, and your trousers in another…
Credit: pexels.com
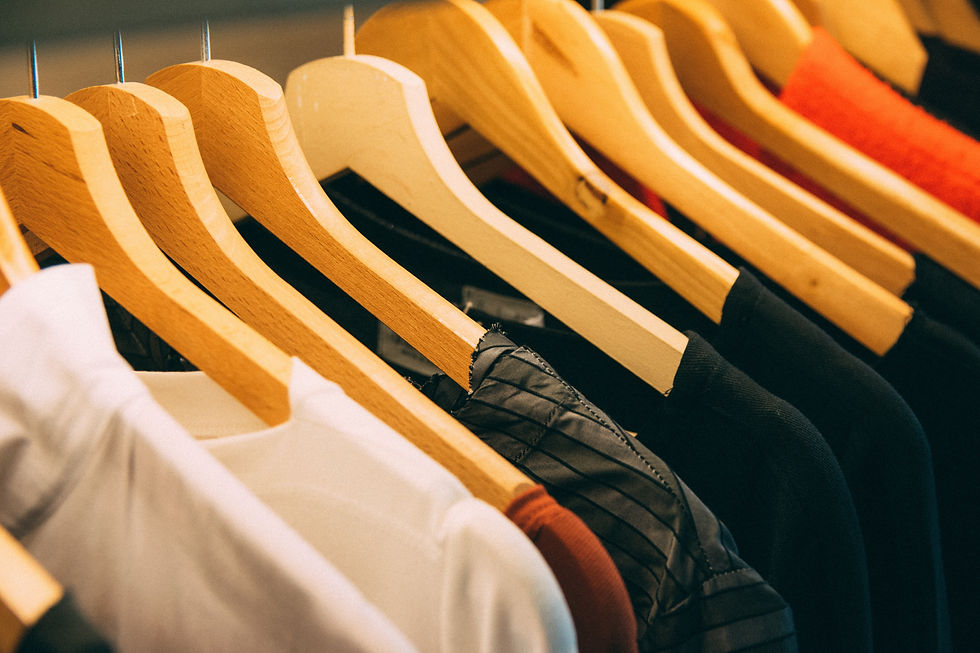
Step Two: Check Your Hangers:
Now, look through your hanger selection and place any broken or misshapen ones into a separate bin bag, ready to throw away at the end. Also, throw away any wire hangers (if you have them), since these have a tendency to bend easily and can cause clothes to either fall off of them or lose their shape over time.
Tip: opt for wooden or cloth-covered hangers where possible, as these will help to preserve your clothes shape and prevent them from sliding off when hung on your clothing rail.

Credit: pexels.com
Step Three: Arrange and Label Your Bags:
Place your laundry basket on your bedroom floor, alongside three reusable carrier bags. Label each of your carrier bags with the following labels:
Bag one: dry cleaning
Bag two: charity donations
Bag three: tailoring and alterations
Remember to fold items neatly before placing into any bags, as this will help to prevent the clothing from creasing and becoming misshapen.
Tip: you could divide your charity bag into the following sub-categories if you wish: clothes for friends; clothes for donation and clothes for sale.
Additionally on an A4 piece of paper, draw a big question mark and place it on the floor next to your bags and laundry basket. This will be your maybe pile; for items that you are initially unsure where to place.

Credit: pexels.com
Step Four: Observe Each Clothing Item In Turn:
Now, look at one clothing item at a time and ask yourself whether it meets the following criteria: Remember, you don’t need to try on any items until question five.
Is the item past its use-by date? - if the clothing item looks worn out, stained, faded, bobbly, ripped, out of shape or just plain outdated, then place the item in the bin bag with the broken hangers. If the item is in good condition, but still looks outdated, then place in the charity donation bag. If you answered no to this question, then continue to question two…
Do you still like this clothing item and would you purchase it now? – if you dislike the item, then place it into the charity donation bag. However, if you still like it, consider whether it’s the colour or style that draws you to it and continue to question three…
Have you worn it within the last two years? – if you haven’t, then ask yourself why. Is it hard to coordinate with other items in your wardrobe? If this is the case, write a note to yourself about purchasing another item that you think would complement it well. If the item is special occasion wear, then either place to one side or place in the charity donation pile (if you believe you would never wear it again). If the clothing item no longer fits with your lifestyle and would unlikely be worn again, then place in the charity donation bag. However, if you have worn the item within the last two years, continue to question four...
Does it suit your body shape and colour characteristics? – look at the items shape and colour and consider whether you feel the item flatters you in all the right places and helps to enhance your complexion, hair and eye colour (although if you are unsure at this stage, place the item neatly in the maybe pile). If you feel that the item doesn’t flatter you, then place in the charity donation pile (or one of the sub-piles created). However, if you feel the item does suit you, then continue to question five…
Does the item fit you well? - try on the item and observe in the mirror how it fits and flatters your body shape. If the item is too small, then place in the charity donation bag (or in one of the relevant sub-category bags). However, if the item is too big and needs to be altered, then place in the tailoring bag. If the item fits you perfectly, then proceed to question six…
Do you feel good wearing the clothing item? – consider whether wearing this item creates feel-good emotions or more negative ones. If the item makes you feel confident and empowered, then place neatly on a hanger in the relevant pile on your bed. However, if you feel the opposite when wearing it, then place in the charity donation bag or in one of the sub-category piles.
Does the item need freshening up or pressing? – If the item requires cleaning or pressing, then place in the laundry basket (i.e. your wash pile) or in the dry cleaning bag, depending on its washing instructions. If the answer is no, then place on a hanger on your bed, ready to put back in your wardrobe.
Tip: repeat the same process for your accessories (except question seven).

Credit: pexels.com
Step Five: Evaluate Your Maybe Pile:
Before proceeding further, revisit each item in your maybe pile and ask yourself the following questions:
Will you actually wear this item?
If you answered yes, where, when and how often?
Does this item really suit you and the style that you’re trying to create?
If you answered yes to these questions, then place neatly (on a hanger) on your bed in its relevant pile. However if you answered no, then place in the charity donation pile or in a sub-category pile.

Credit: pexels.com
Step Six: Review the Remaining Contents of Your Wardrobe:
After answering the above questions (step four), your remaining clothes should:
Be in good condition and not look outdated.
Be in styles that you like and fit with your desired image.
Easily coordinate with each other.
Be appropriate for you and your lifestyle.
Suit your body shape and colour characteristics.
Fit your figure well (i.e. not too tight or too baggy, is the right length for your height etc).
Help you feel confident about yourself when worn.
Be clean, fresh and ready to wear.
Step Seven: Clean Your Wardrobe Space:
Next, give your clothing rail (and any shelves in your wardrobe space) a dust, before vacuuming the floor space.

Credit: pexels.com
Step Eight: Arrange Your Wardrobe Space:
Now, organise your clothes (and accessories) in a way that works for you…
You can arrange your clothes within your wardrobe in one of the following ways:
By grouping item types together (i.e. placing skirts together; your dresses within one section, then your trousers, cardigans and jumpers, tops etc).
By colour (i.e. placing all red clothes together, then orange, then yellow, green, blue, purple, pink, neutrals etc).
By season (i.e. placing all of your spring and summer clothes together, then your winter and autumnal clothing).
By style (i.e. placing your comfy clothing in one section, followed by more formal, classic styles etc).
By hem length (i.e. placing long-hanging garments like dresses and coats at one end of the rail and shorter items like skirts, tops and skirts at the other end, with trousers placed in the middle).
By lifestyle capsule - read “the benefits of a capsule wardrobe and how to create your own”, to learn more about arranging your wardrobe into lifestyle capsules.
Here are some more tips to consider when arranging your wardrobe space:
Store out of season clothing either in a different wardrobe space or at one end of your clothing rail, as this will ensure that this season’s clothing is more accessible. Alternatively, you could store some clothing under your bed in space-saving, transparent vacuum packed bags, since these will compress your clothes into a small package, whilst protecting them from dust and moisture damage.
Store seasonal accessories in a place that is not in the way of this season’s items, but is still visible and accessible, such as a shelf in your wardrobe space.
If hanging space is limited, fold items like jumpers and jeans on a shelf (if available) or in a drawer. This will still allow you to see what you own, whilst allowing air to circulate for fresher smelling clothes.
Avoid overcrowding your wardrobe, as this will prevent air circulating through your garment’s fibres. Prioritise what items should be hung on your clothing rail and ensure there is enough space to move the hangers across the rail.
Invest in high quality padded (for fine knits and delicate dresses) and wooden hangers. Also, ensure any hangers used are in proportion to the clothing being hung, to prevent it from becoming misshapen.
Credit: pexels.com
Step Nine: Make Use of Storage Solutions:
To create a tidy wardrobe space that really works for you, whilst maximising the space that you have, consider using a selection of storage solutions and wardrobe organising tools.
Here are some examples of storage solutions that you could use:
Shelf and drawer dividers – these are useful for neatly organising underwear drawers (although make sure when arranging this space, that you discard any items that look bobbly, discoloured, worn out, ripped or off-white and only return wearable items).
Freestanding hanging rails – these can be slotted into your wardrobe space or placed in a spare room for extra hanging space.
Canvas hanging organisers – these are ideal for creating extra shelving space.
Over the door organisers – these are often available for storing shoes and handbags.
Under the bed, vacuum packed bags – see step eight.
Storage containers with lids or pull-out baskets
Multi-arm hangers (for trousers and skirts) and cascading mini hook hangers – to help maximise your rail space.
Belt hangers.
Tie racks.
Accessory stands.
Hat boxes
Transparent Ziploc bags – for storing delicate hosiery items in your drawers and prevent snags and tears.

Credit: pexels.com
Step Ten: Take Stock Of Your Wardrobe:
Finally, complete an audit of your wardrobe, by noting what and how many of each item you already own and which items you feel your wardrobe is lacking and should be looked for when shopping.
To see how an in-person wardrobe de-cluttering session could benefit you, visit my deluxe session choices or complete style and lifestyle package.
Credit: https://www.stylecoachinginstitute.com

